Getting started
IDE Extension Quick Introduction
Guide
Your Security Copilot in IDE: ZAST Express
Assess early, fix as you build: elevate your security posture!
Integrate security assessment from the start of your development workflow to breeze through security reviews and avoid expensive late-stage fixes.
ZAST Express brings code, open-source dependency, and IaC configuration analysis directly to your IDE. Address vulnerabilities the moment they pop up—no need to leave your coding environment.
Key Features
- 🆕 Zero-Day Detection - Discover unknown vulnerabilities before they're exploited
- 🔍 Zero False Positives - Every vulnerability verified with PoC
- ⚡ One-Click Assessment - No complex configuration required
3 Steps to Run ZAST Express
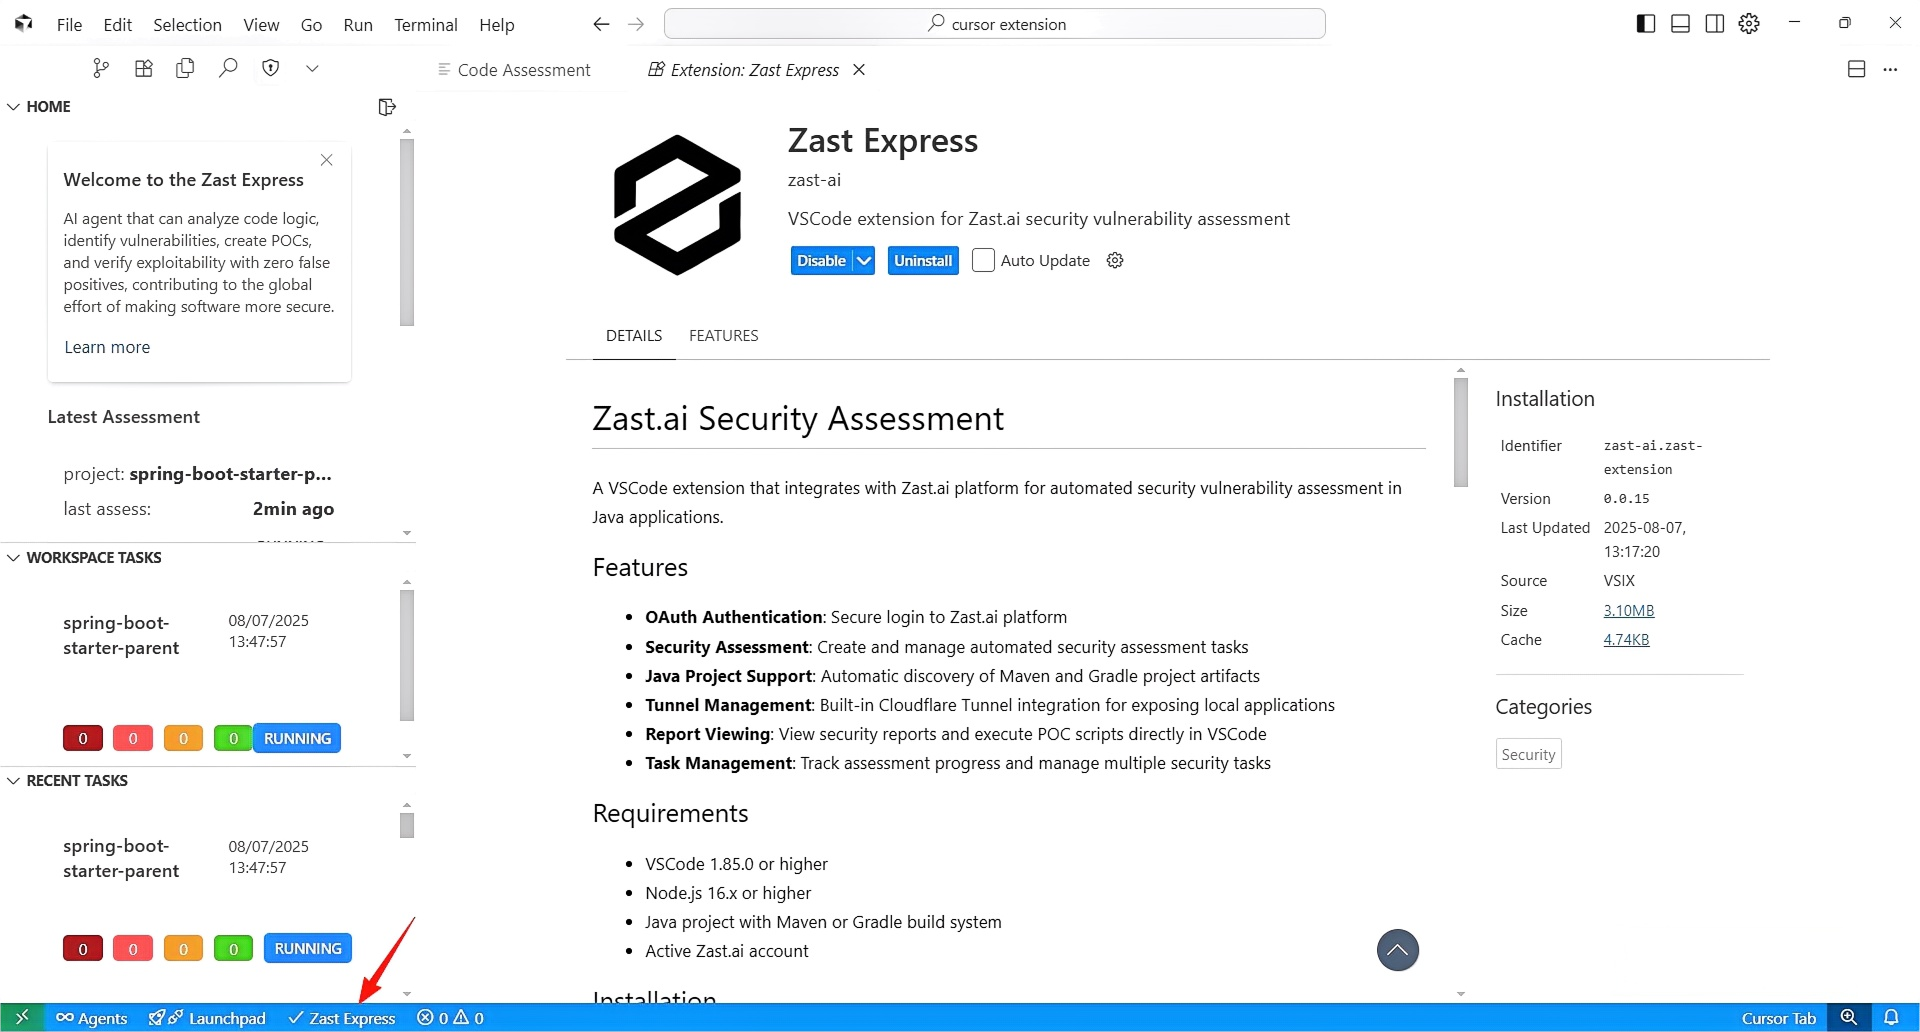
- Install the extension from marketplace
- Click Zast Express to launch assessment
- View results when the assessment finished
Installation
VS Code/Cursor Marketplace
- Open VS Code or Cursor
- Go to Extensions (Ctrl+Shift+X)
- Search for "ZAST Express"
- Click Install
Quick Start
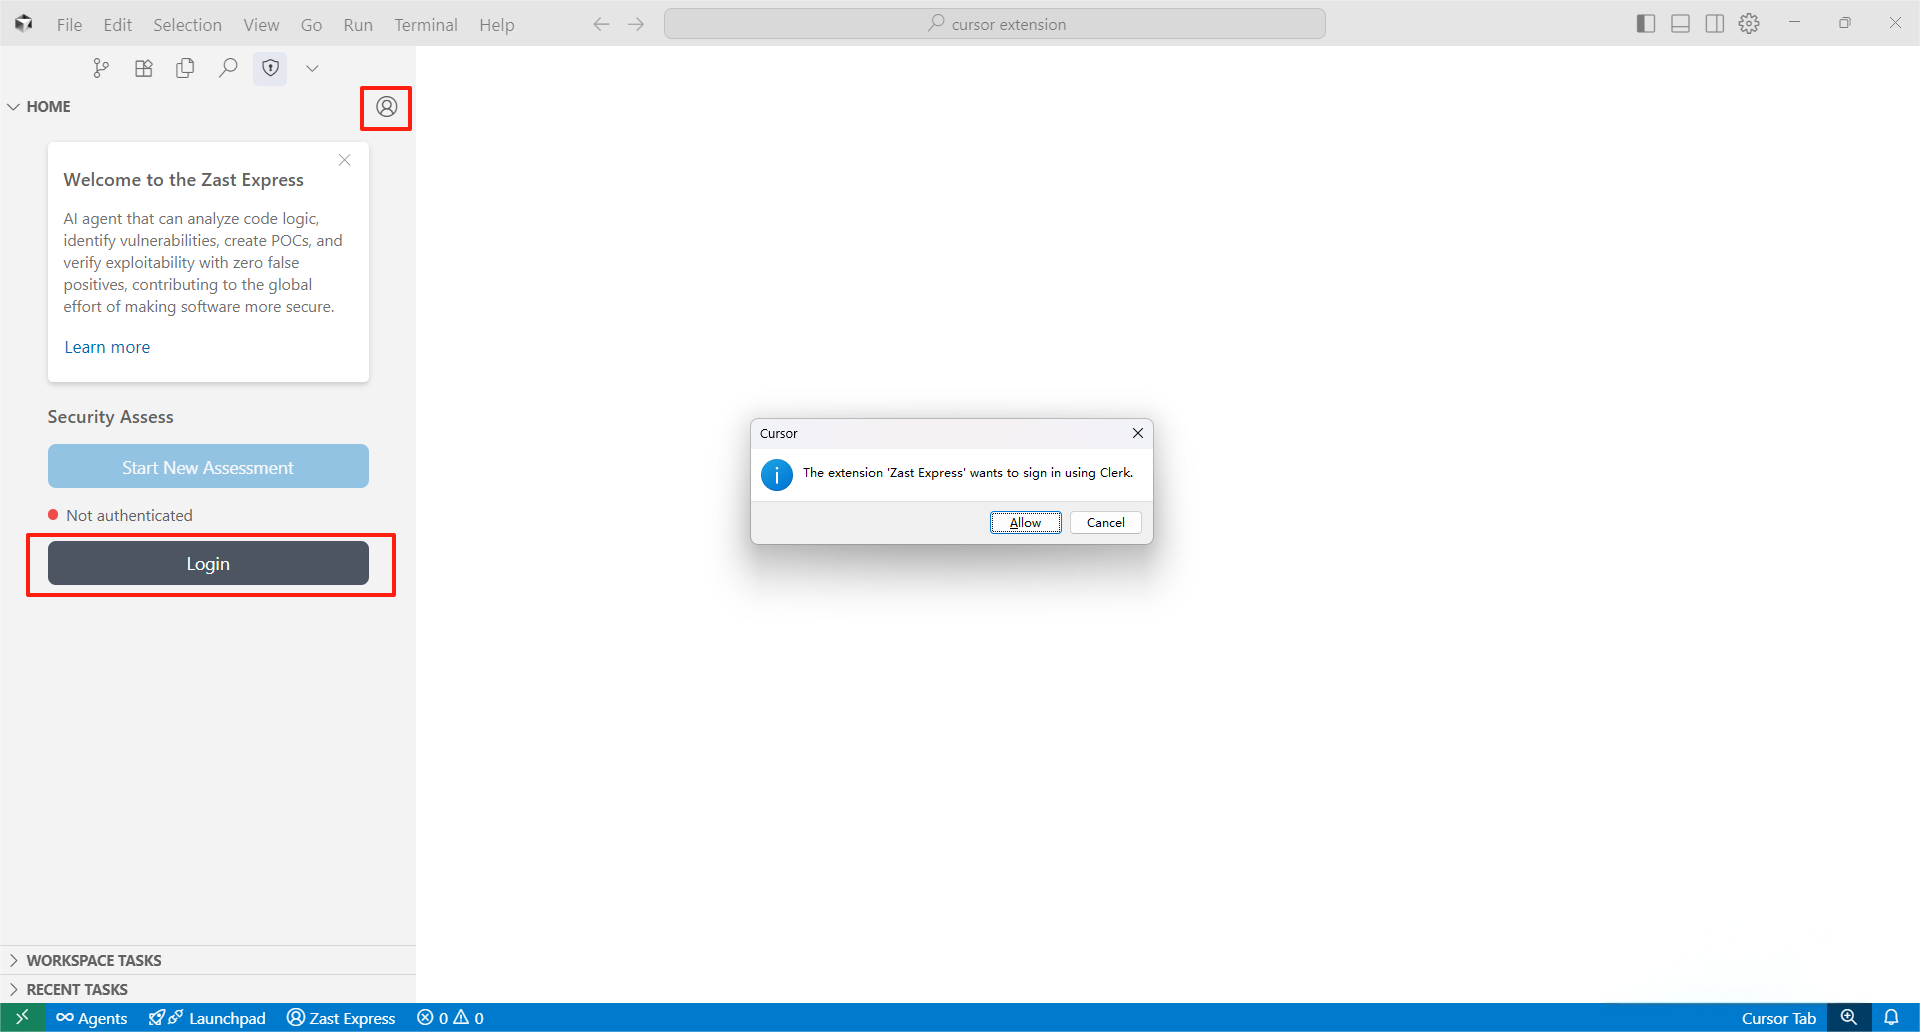
Step 1: Login to ZAST Express
Click ZAST Express to open the panel. Login from the "Home" section or by clicking the profile avatar in the top-right corner.
Step 2: Select Artifacts
After successful login, you'll see the "Security Assessment" panel. Select artifacts directly from your workspace. Also, we recommend uploading source code to improve assessment depth and accuracy.
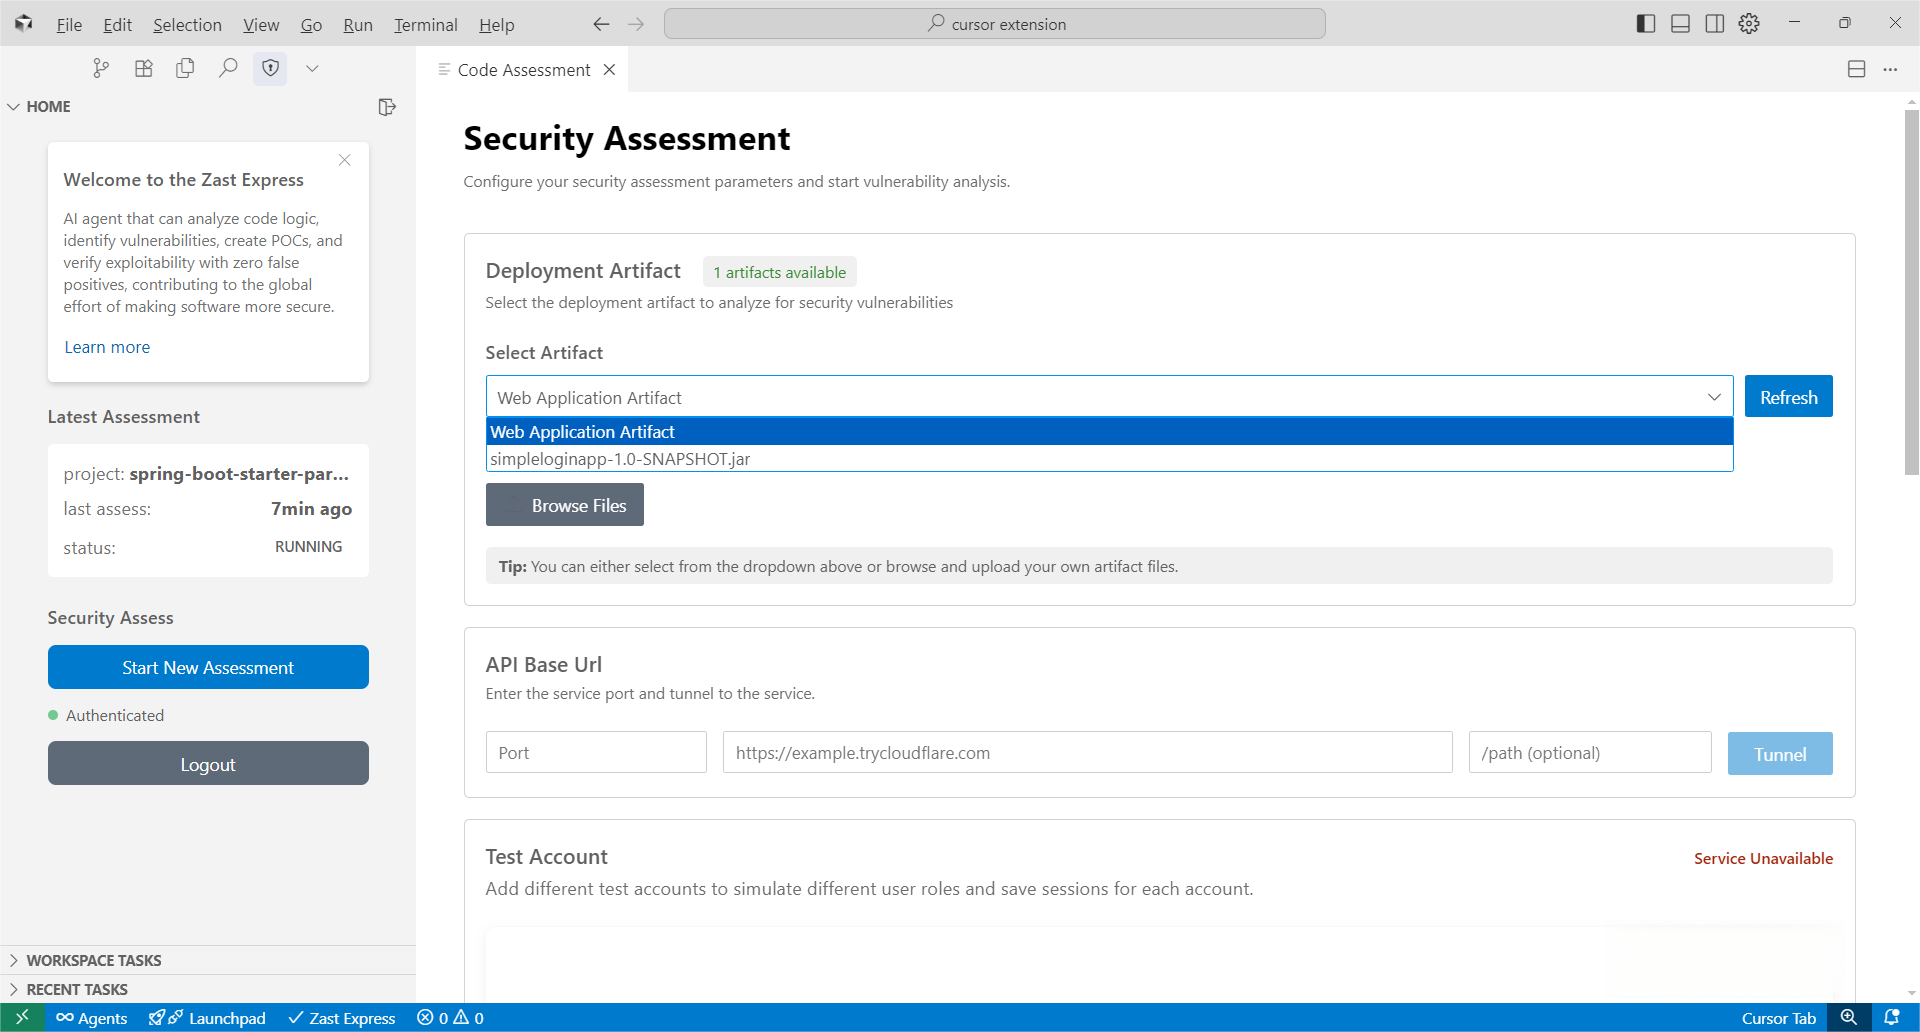
Step 3: Set Up Connectivity via Cloudflared Tunnel
To establish assessment connectivity, input the port where your project is running and click "Tunnel." This will automatically install cloudflared and generate a secure access link for your project. During the assessment, please ensure the service remains continuously accessible.

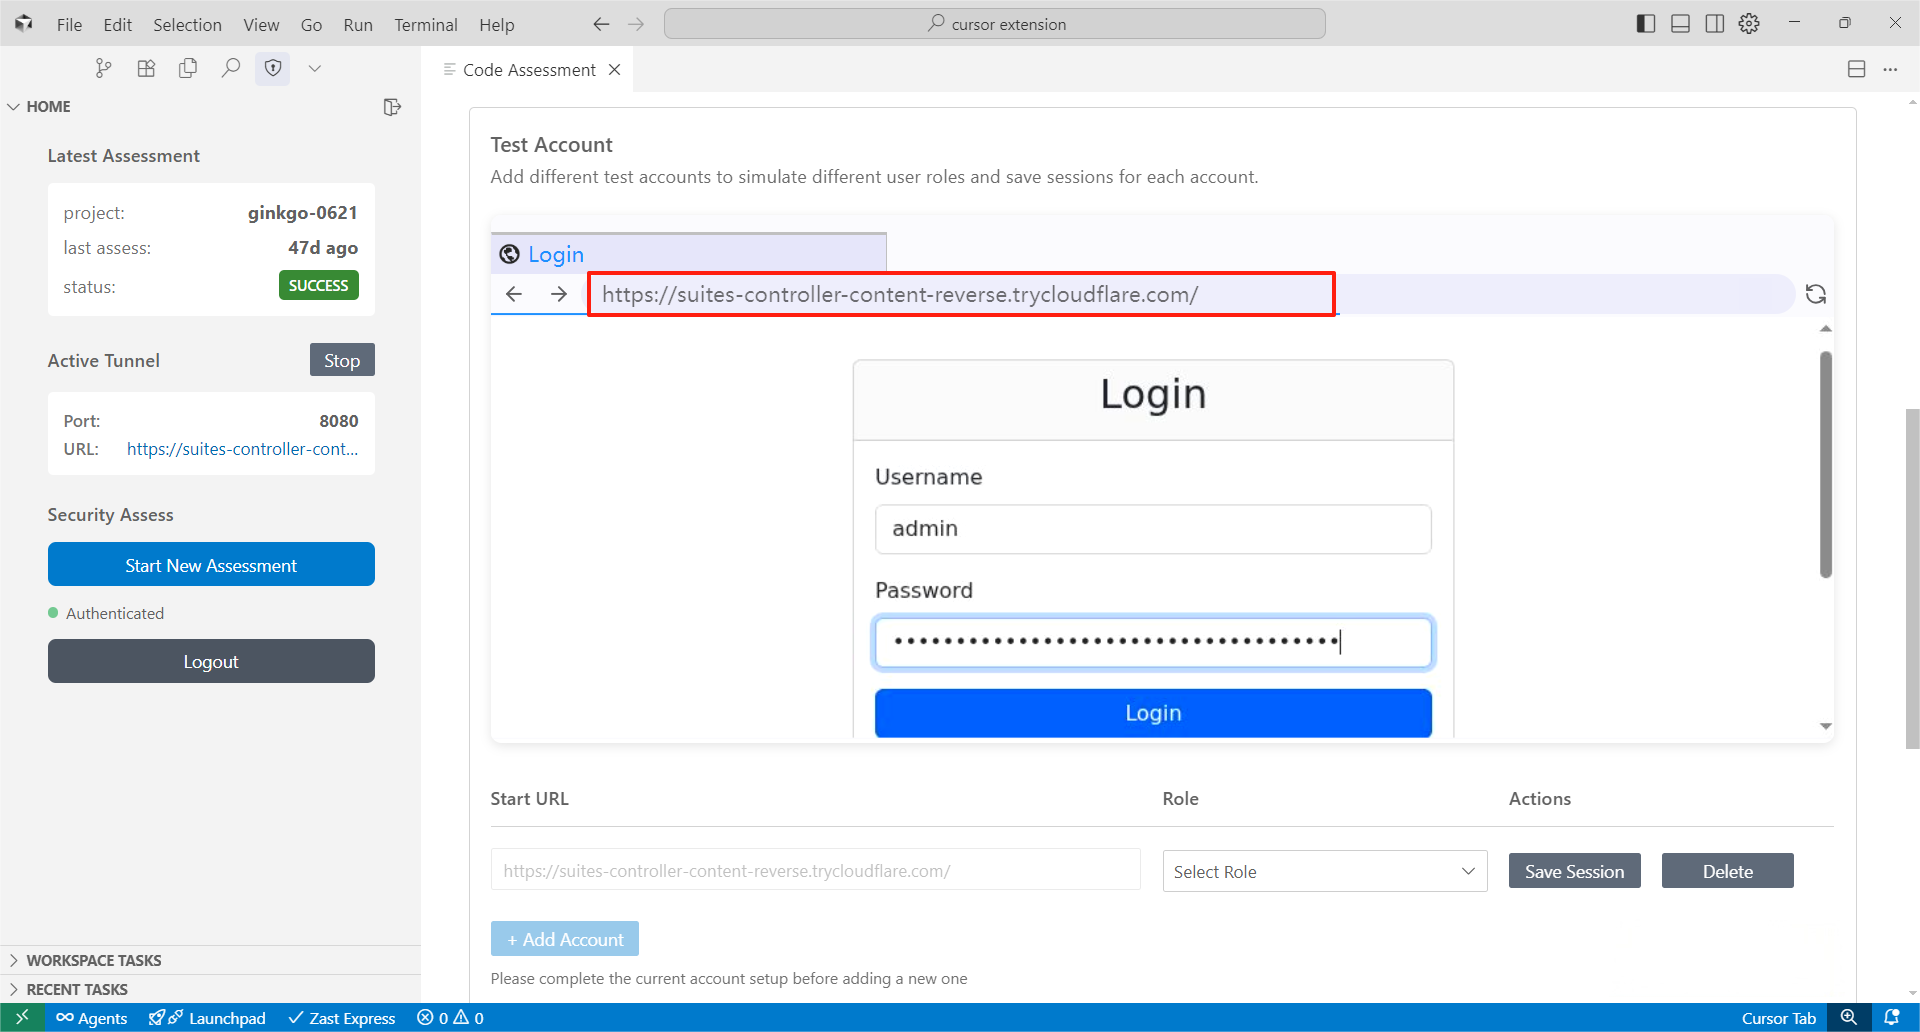
Step 4: Login Test Accounts via Embedded Browser (**to test features protected by authentication**)
If your target service requires authentication, use the embedded browser to log in with test accounts of different roles. Replace the URL in the embedded browser with your login URL at first and then login with the test accounts.
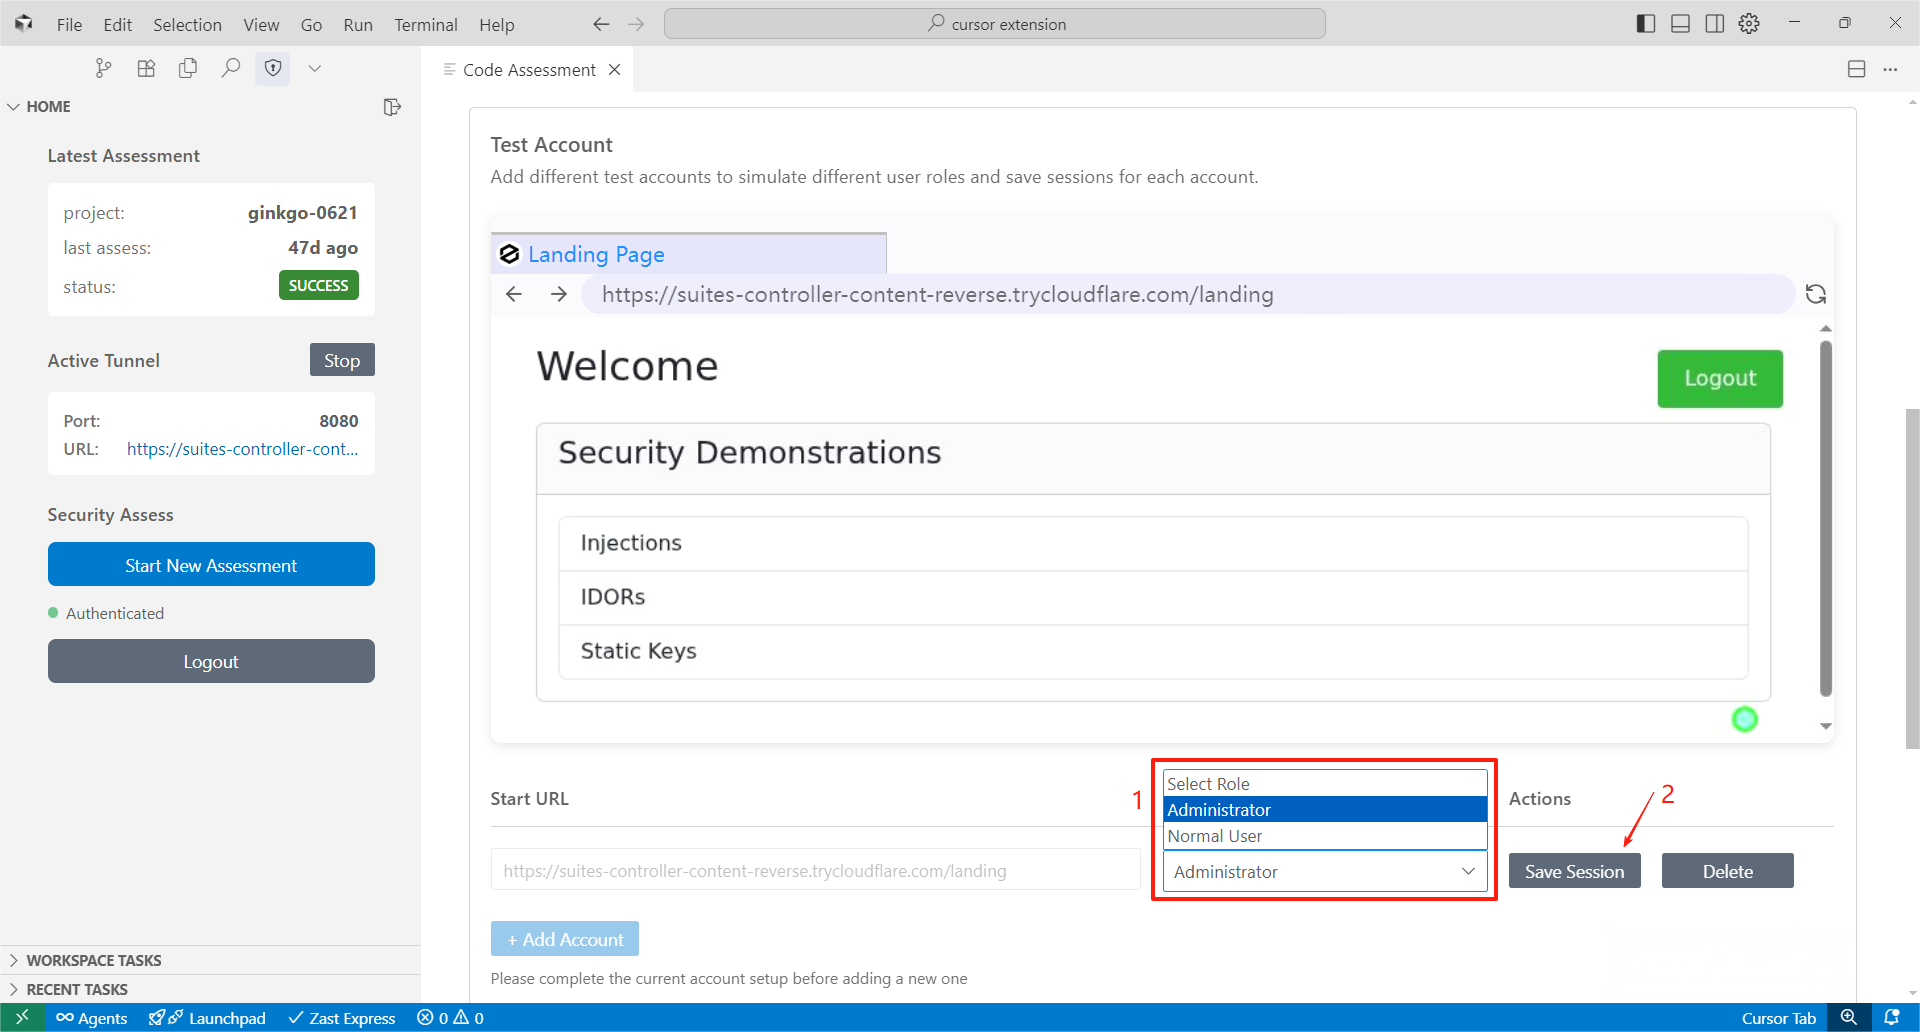
After logging into the test account, select the correct role and save the user session.
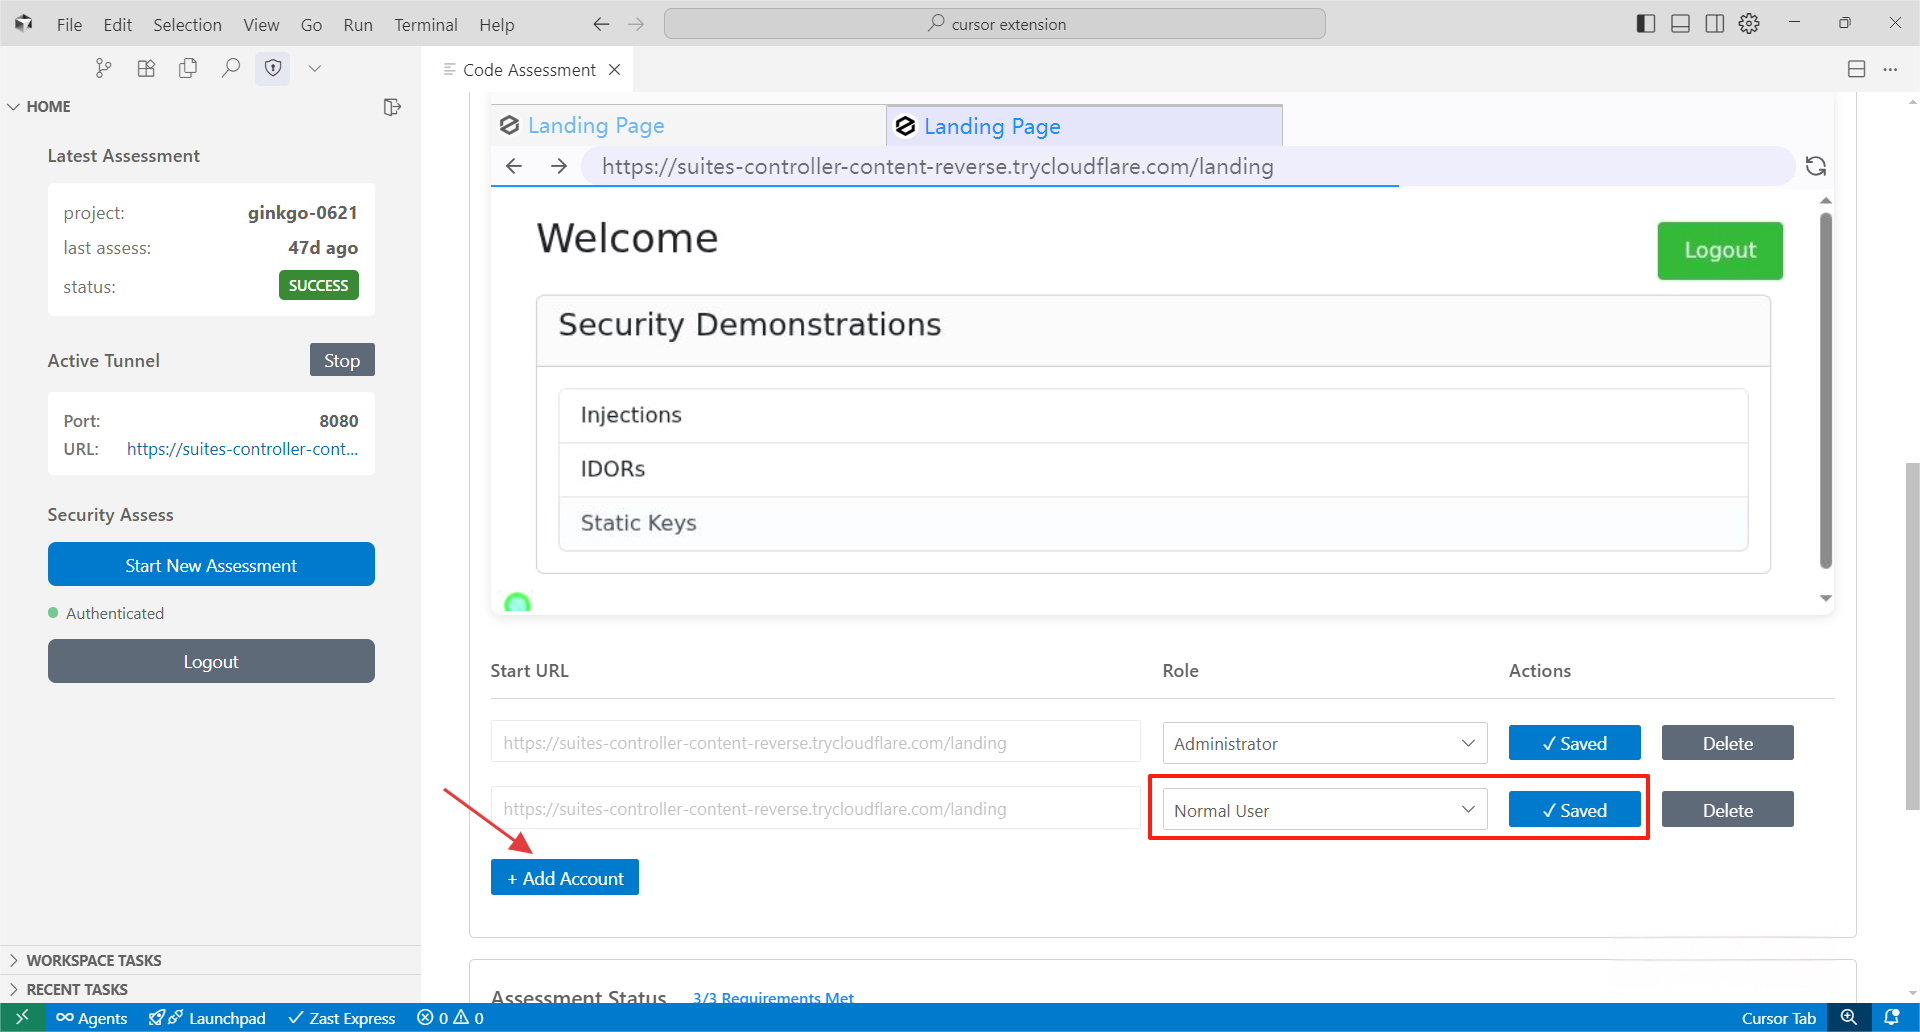
Click "Add Account" to configure multiple test accounts, and don't forget to choose role and save session for all test accounts.
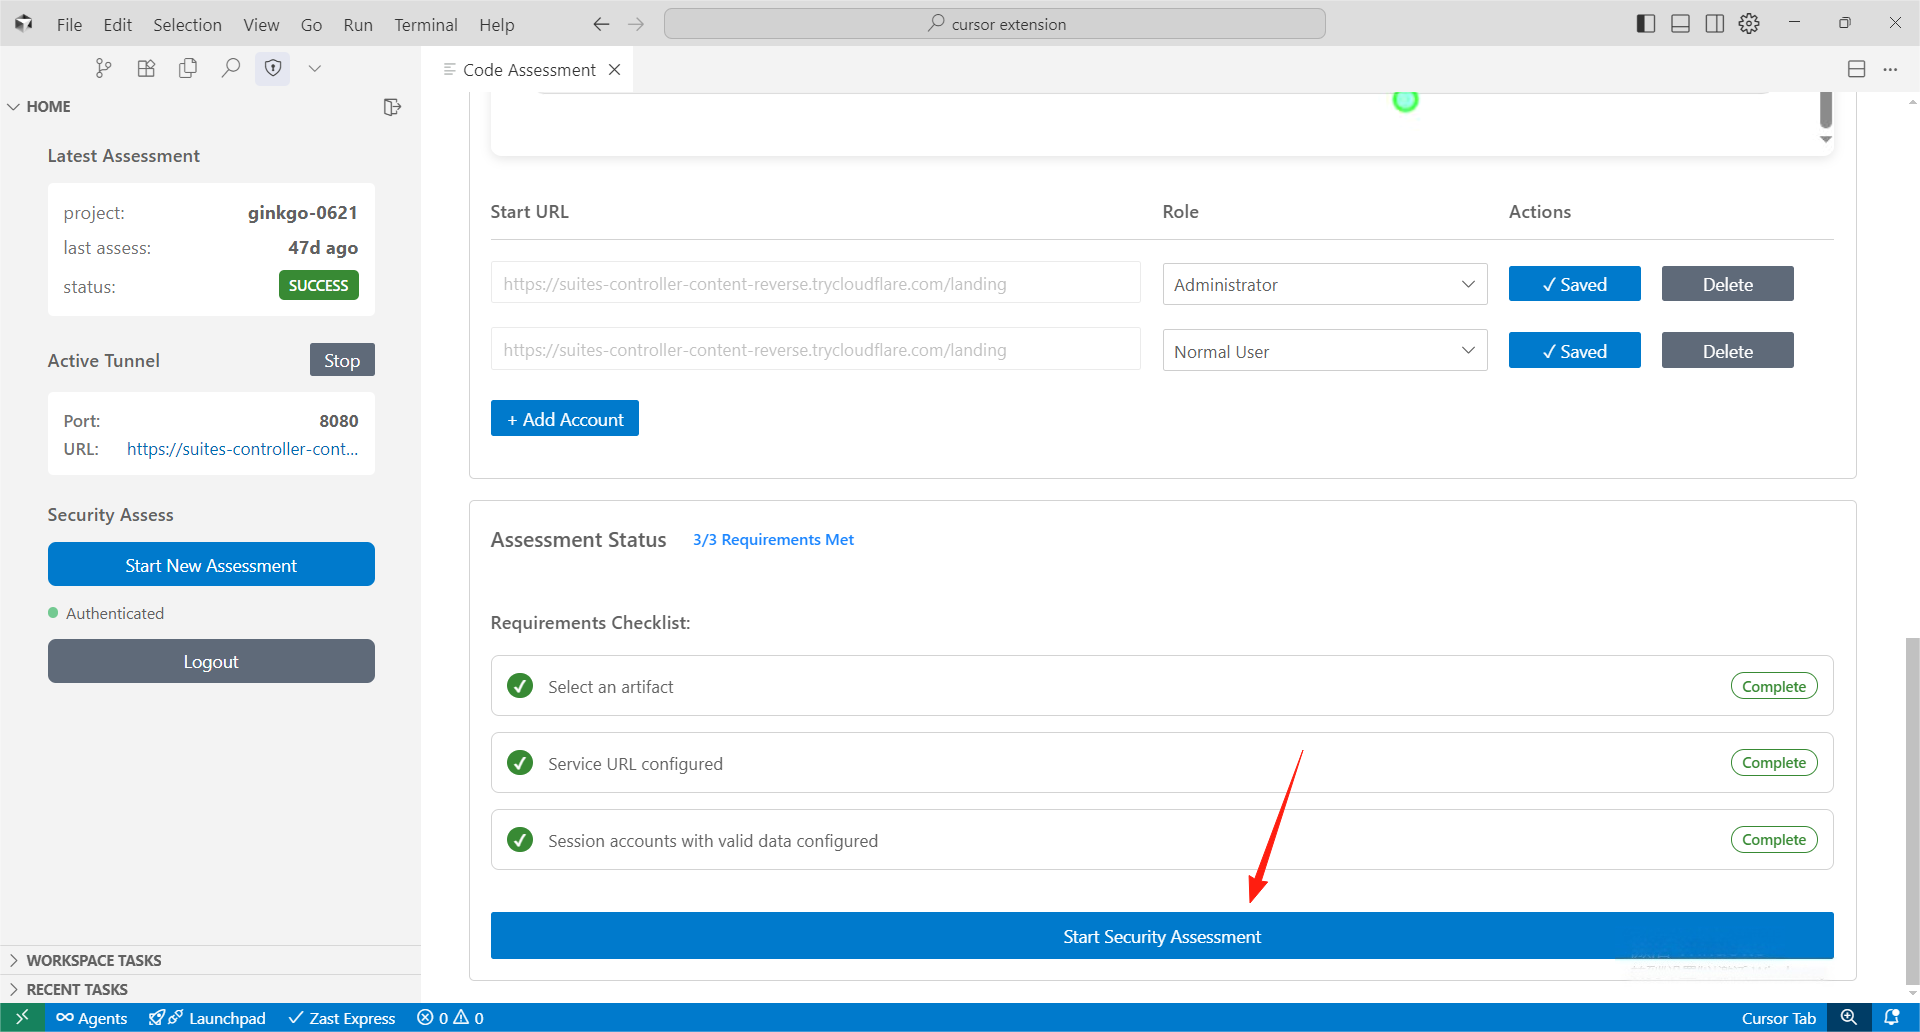
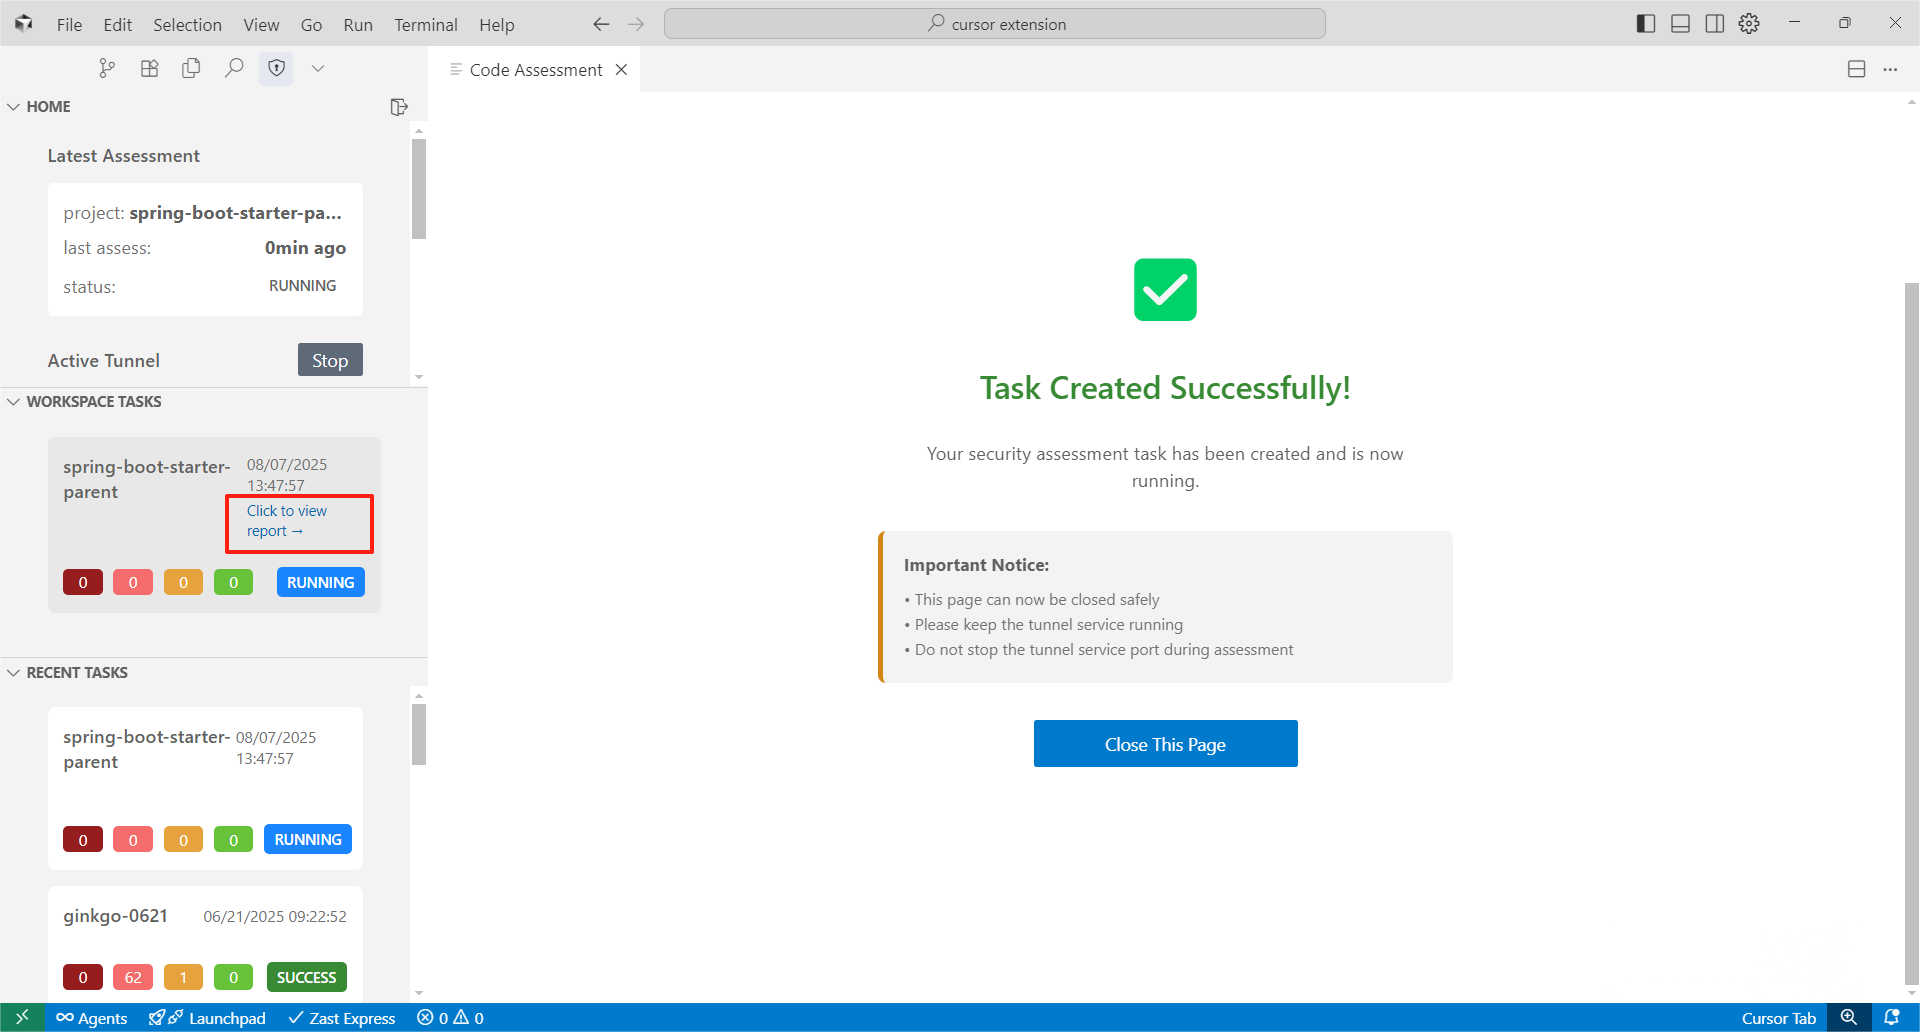
Step 5: Start Assessment
After completing all previous steps, click the "Start Security Assessment" button at the bottom to submit your task.
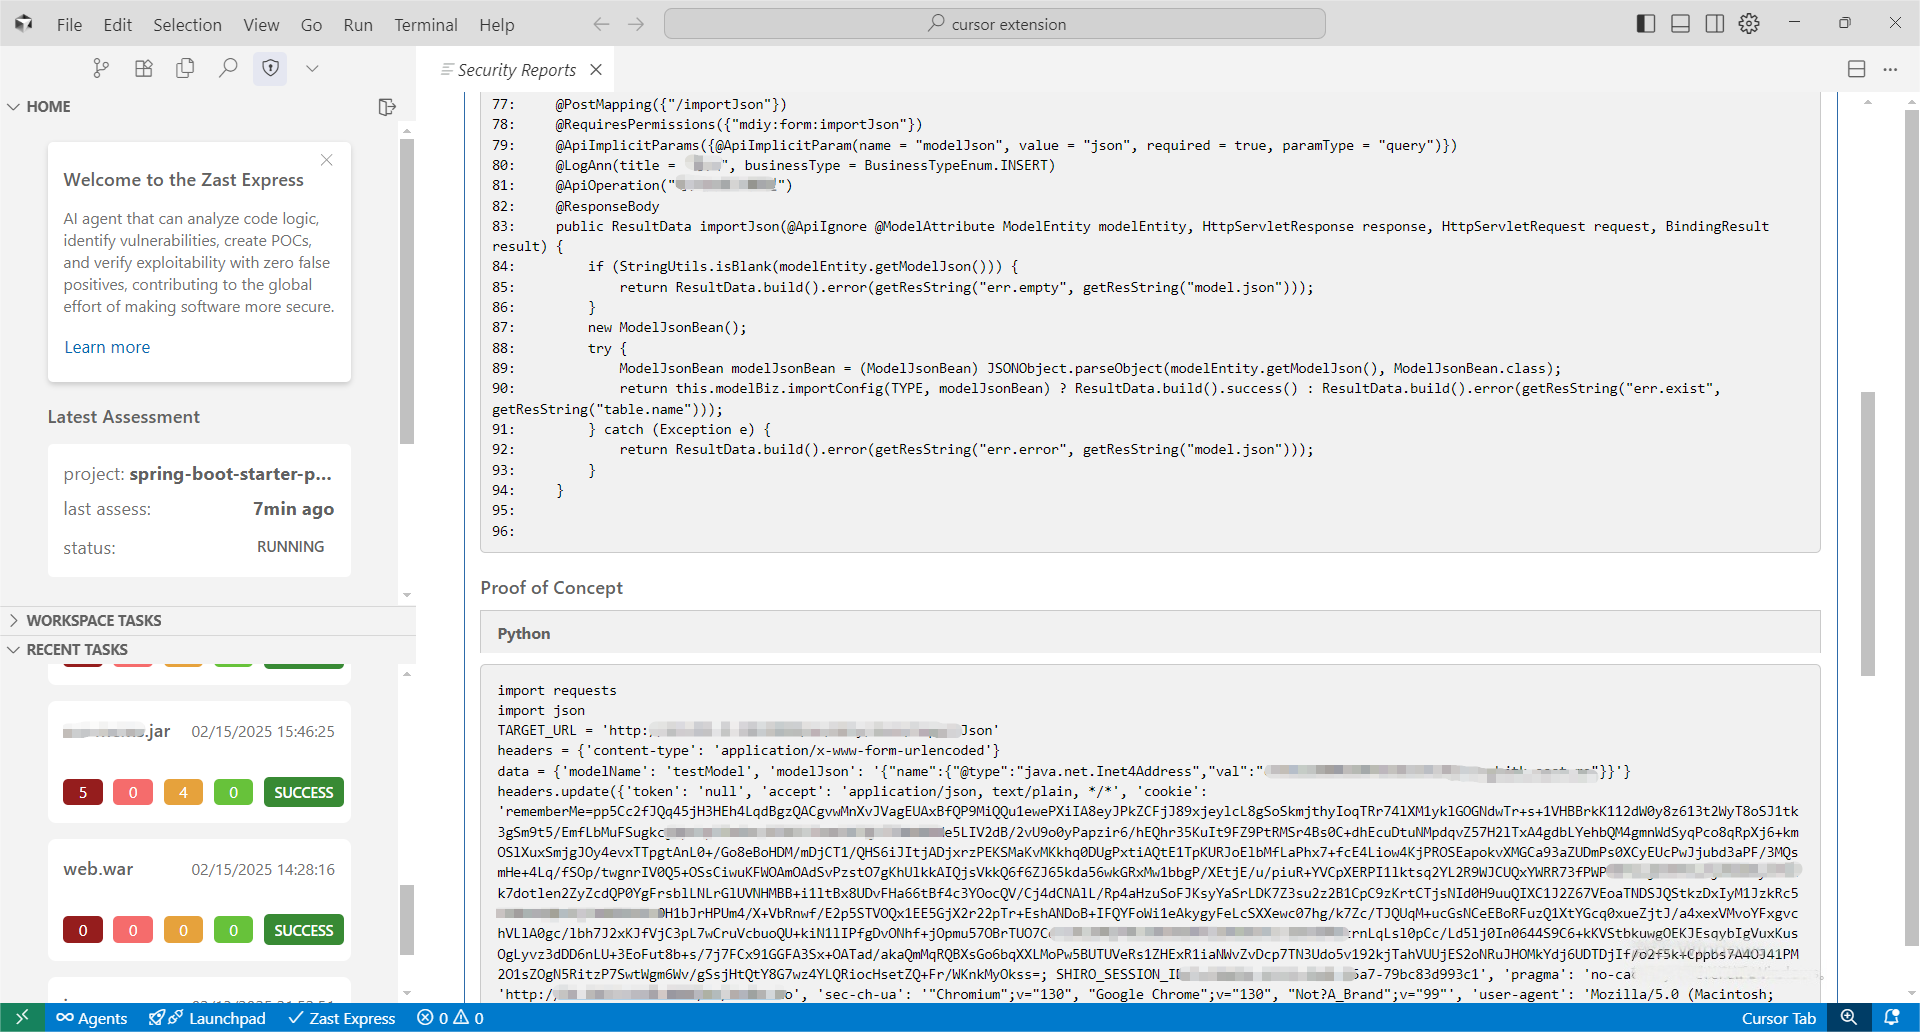
Step 6: View Reports
When the assessment is complete, you'll see the task in your recent tasks list. Click "Click to view report" to access detailed results.
Video Guide for step-by-step help
Task Management
The left sidebar provides two task sections for managing your security assessments:
- Workspace Tasks: Shows the latest 5 tasks for the Project-specific tasks (e.g., if you assess one project multiple times, the related tasks will be listed in workspace tasks)
- Recent Tasks: Shows the latest 10 tasks across all your projects
For all assessment reports' archives, please visit ZAST Reports Dashboard.
Supported Environments
- IDEs: VS Code, Cursor
- Languages: Java, JavaScript (More languages support on the way)
- Frameworks: Web applications
Support
- Issues: GitHub Issues
- Email: support@zast.ai